Showing posts with label canning. Show all posts

Thursday, July 17, 2014

Raspberry Freezer Jam

It's raspberry season in the back yard.  Raspberry jam is actually what started me preserving food.  I joke that Freezer Jam was my gateway drug.  If you've seen all of my canning recipes and thought I was crazy, here's your chance at something easy.  This recipe is from Ball.


Freezer Jam

You will need:
  • 4 cups crushed fruit (berries, apricots, grapes, pears, plums, or other tender fruit)
  • 1 1/2 cups of sugar
  • 5+ Tbsp Ball Real Fruit Instant Pectin (I typically need a bit more to get the right jam texture)
What to do:
  • Stir sugar and pectin in a bowl.
  • Add berries, stir 3 min
  • Ladle jam into clean jars to fill line.  Twist on lids.  Let stand until thickened, about 30 min.
Serve immediately, refrigerate, or freeze up to 1 year.

Friday, July 11, 2014

Chocolate Raspberry Sauce

It's raspberry season in our backyard.  I've spent a fair bit of time preserving the raspberries as they came in, though I think the quantity was cut in half as Oldest Kid picks one for the bucket, one for her, one for the bucket, one for her.  She just loves anything that ends in ~berry.

Yesterday afternoon, I made a family favorite, Chocolate Raspberry Sauce.  Ice cream topping is the obvious go-to for this treat.  If you're tenting it, ice cream in a cooler over the weekend may not work.  If you've got access to a fridge with a freezer, ice cream works a lot better.  Or maybe you want to create Pie Iron dessert with it?  If you make up a pie iron dessert, I'd love to hear about it.


What you need:

  • 4 1/2 cups crushed red raspberries (strawberries also work, HERE is my friend's recipe)
  • 6 Tbsp Ball Real Fruit Classic Pectin
  • 1/2 cup sifted unsweetened cocoa powder
  • 6 3/4 cups granulated sugar
  • 4 Tbsp lemon juice
What to do:
  • Prepare your boiling water canner and your separate pot of simmering water for lids and bands
  • Combine cocoa powder and pectin in a medium glass bowl, stirring until evenly blended.  Set aside
  • Combine crushed raspberries and lemon juice in a large saucepan.  Whisk in pectin mixture until dissolved.  Bring to a boil over high heat, stirring frequently.  Add sugar all at once and return to a full rolling boil, stirring constantly.  Boil hard for 1 minute, stirring constantly.  Remove from heat and skim off foam.
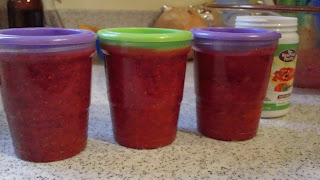
  • Ladle hot chocolate raspberry sauce into hot jars, leaving 1/4 inch headspace.  Remove air bubbles.  Wipe rim.  Center lid on jar.  Apply band until it is fingertip tight.
  • Process jars in your boiling water canner for 10 minutes.  Remove jars and cool.

If you're feeling generous, this has been well received when I have given it as a gift.  

I also want to clarify that I only use canning recipes from sources I trust to know about food safety.  Food preservation is not something I mess around with, experiment, or tweak.  I trust Ball and I trust the author of the blog I linked to earlier, I call her my Canning Guru.

Don't forget to follow me on Facebook.

Tuesday, July 1, 2014

Strawberry Jam & Strawberry Rhubarb Jam

Are you sick of my strawberry posts yet?  Ok, last one.  At least for now.  The raspberries are starting to be picked in the backyard, maybe I'll move on to those?

Anyway.  Last week, the kids and I picked 25 or so pounds of strawberries.  Because of our trip to Harrison Lake, I needed to get all those strawberries processed in a really big push on Thursday.  Fresh picked berries have a shorter shelf life than those berries purchased in the grocery store, especially since the place we go is as close to organic as you can get in the area.  I was so busy in the kitchen, I didn't even start to get things packed and in the camper until after dinner.

I have shared before that I like simple meals while camping.  Sandwiches are unexciting, but an easy lunch that can be assembled quickly if we're late to get back to the camper for lunch.  Or they can be packed for a picnic while hiking.  Youngest kid loves, LOVES her PB&J sandwiches, and homemade jam makes them so much better.

Strawberry Jam

What you need:
  • 2 quarts strawberries
  • 6 tablespoons Ball Classic Pectin
  • 1/4 cup lemon juice
  • 7 cups sugar
What to do:
  • Wash strawberries; drain.  Remove stems.  Crush strawberries one layer at a time.  Combine strawberries, classic pectin, and lemon juice in a large sauce pot.  Bring to a boil, stirring occasionally.  Add sugar, stirring until dissolved.  Return to a rolling boil.  Boil hard 1 minute, stirring constantly.  Remove from heat.  Skim foam if necessary.  Ladle hot jam into hot jars, leaving 1/4-inch headspace.  Adjust two-piece caps.  Process 10 minutes in a boiling-water canner.
Strawberry-Rhubarb Jam

What you need:
  • 2 cups crushed strawberries
  • 2 cups chopped rhubarb (about 4 stalks)
  • 6 TBS Ball Classic Pectin
  • 1/4 cup lemon juice
  • 5 1/2 cups sugar
What to do:
  • Combine strawberries, rhubarb, classic pectin and lemon juice in a large saucepot.  Bring to a boil over high heat.  Add sugar, stirring until dissolved.  Return to a rolling boil.  Boil hard 1 minute, stirring constantly.  Remove from heat.  Skim foam if necessary.  Ladle hot jam into hot jars, leaving 1/4 inch headspace.  Adjust two-piece caps.  Process 10 minutes in a boiling-water canner.

Thursday, June 12, 2014

Dill Pickles

Another post from my archives of canning.  This is from the same neighbor that gave me the Bread & Butter Pickle recipe.  As I'm getting ready for another camping trip this weekend, you can bet these are ready to go.

For each quart of pickles, you will need:
  • 5 or 6 4-inch pickling cucumbers
  • 3 or 4 heads of fresh dill
  • 1 teaspoon mustard seed
  • 2 cups water
  • 1 cup cider vinegar
  • 1 tablespoon pickling salt
What to do:

Pack cucumbers loosely in hot, clean quart jars.  Add dill and mustard seed to each quart.  Make a brine by combining water, vinegar, and salt.  Bring to boiling.  Slowly pour hot brine over cucumbers.  Prepare lids and rings.  Wipe jar and place lids and rings on jars.  Process in hot water bath, 10 minutes for pint and 15 minutes for a quart.  These pickles need to set for about 4 weeks before they are ready to eat.

If you want Kosher pickles, omit the mustard seed and add 1 clove of garlic and 1 small piece of hot red pepper to each quart.

Sunday, June 8, 2014

Bread & Butter Pickles

Not long ago, I shared my recipe for Zucchini Relish.  What goes with relish?  Pickles, of course.  What do pickles go with (and on)?  The most common foods eaten while camping, hamburgers and hot dogs and brats.

Early in my canning phase, I walked down to a neighbor's house and she was in the middle of canning pickles from her family recipe.  We had an abundance of cucumbers in the garden that year.  A day or so later, the neighbor dropped off copies of her family recipes and I found myself further into the world of home canning.

These are just as good as my neighbor told me.  Everyone who has tried them enjoys them.

What you need:
  • 4 quarts sliced pickling cucumbers
  • 6-8 medium onions, sliced
  • 4 cloves garlic
  • 1/3 - 3/4 cup pickling salt (you can use regular salt, pickling salt is courser)
  • crushed ice
  • 5 cups sugar
  • 3 cups cider vinegar
  • 2 TBS mustard seed
  • 1 1/2 tsp ground tumeric
  • 1 1/2 tsp celery seed
What to do:
Combine sliced cucumbers, onions, garlic (speared on wooden toothpicks) and salt.  Cover with crushed ice and mix well.  Let cucumber mixture stand for 3 hours, stirring occasionally.  Drain well. Remove garlic.  Combine sugar, vinegar, mustard seed, tumeric and celery seed.  Pour over cucumber mixture.  Bring to a boil for about 7 minute.  Pack cucumbers and hot syrup into hot jars.  Use knife to remove any air bubbles.  Wipe jar rim with cloth to remove any debris.  Cover jars with hot lids and rings.  Process in hot water bath, 10 minutes for pint and 15 minutes for quart.  Pickles are ready to eat in about 2-3 weeks.  They will be good right away but it is worth waiting at least 2 weeks before eating.

Monday, June 2, 2014

Applesauce

Applesauce is another easy side dish or healthy snack.  So far, I've only done homemade freezer applesauce.  This year, I'd like to expand it to a shelf-stable applesauce.

First, the recipe I've used for a couple of years.  It is from http://thatscountryliving.com.

What you need:
  • 18 cups of apples (one variety or mix and match), cored, peeled, and sliced
  • 3/4 cup water
  • 3/4 cup brown sugar
  • 3/4 cup sugar
  • 1 tbsp cinnamon
What to do:
  • Turn slow cooker on low.  Simmer apples on low for about 5 hours, stirring every so often.
  • Apples will break down into mush.  Turn slow cooker off and let apples cool for an hour or so (until it's cool enough to handle).
  • You have several options when it comes to preparing your applesauce, which depends on your consistency preference.  If you like chunkier applesauce, might just use a potato masher.  If you like it with a smoother texture, you can run it through a food mill or other processor.  I use my immersion blender and leave some chunks.
  • Your applesauce is now ready for freezing/canning!
When freezer canning, I like to use Ball Freezer containers.  What size I use depends on how many people I'll plan to feed with the container.  The smaller containers are great for a couple of school lunches.  The bigger containers are great for a side dish at the dinner table (or picnic table).

Like I said, I want to make shelf stable applesauce this year.  Looking the applesauce recipe in my canning bible, it said to pour sauce into hot jars, pint or quart.  Then adjust the 2 piece cap and process pints and quarts for 20 minutes in a boiling-water canner.

Friday, May 9, 2014

Zesty Salsa

Simple snacks while camping is a must. What is simpler than tortilla chips and salsa? I've shared my love of canning and this is my favorite salsa recipe from The Ball Blue Book. You can make it as hot or mild as you'd like with hot sauce and the heat of the peppers you use.

What you need:
  • 10 cups chopped, seeded, peeled, cored tomatoes (about 6 lbs)
  • 5 cups chopped and seeded long green peppers (about 2 lbs)
  • 5 cups chopped onions (about 1.5 lbs)
  • 2 1/2 cups chopped and seeded hot peppers (about 1 lbs)
  • 3 cloves garlic, minced
  • 2 Tablespoons cilantro, minced
  • 3 teaspoons salt
  • 1 1/2 cups cider vinegar

What to do:

Combine all ingredients in large sauce pot, adding hot pepper sauce if desired. Bring mixture to a boil. Reduce heat and simmer 10 minutes. Ladle hot salsa into jars, leaving 1/2 inch head space. Adjust 2 piece caps. Process 20 minutes in boiling water container.

Saturday, April 26, 2014

Zucchini Relish

We tried this at friends' house a few years ago and fell in love with this Zucchini Relish.  It has a bit of a different taste than your typical pickle relish.  Burgers, brats, dogs - all go hand-in-hand with camping.  Why not dress it up a bit differently?

Ingredients

  • 10 cups ground or shredded zucchini
  • 4 cups ground or shredded white onions
  • 5 Tbs salt
  • 2 1/4 cups white vinegar
  • 4 1/2 cups sugar
  • 1 tsp nutmeg
  • 1 tsp dry mustard
  • 1 tsp tumeric
  • 1 tsp corn starch
  • 1/2 tsp pepper
  • 2 tsp celery salt
  • 1 green bell pepper, diced
  • 1 red bell pepper, diced
How to make it:
  • Mix zucchini, onions, and salt.  Allow to stand overnight.  Drain and rinse with cold water.
  • Add remaining ingredients and bring to a boil
  • Simmer uncovered for 30 minutes
  • Pour into hot, sterilized jars, apply 2 piece lid.
  • Process 5 minutes in hot water bath.

Camping season is canning season

The delights of the camping season means that our garden and the farmer's market are full of bounty.  As I was packing some more food into the camper this afternoon, I inevitably grabbed a fair number of home canned goods.  Many of our favorites are perfect for the camping trip.  I thought I'd share some of my recipes here.

The beauty of home canned goods is that they are shelf stable until they're opened, you just want to keep them in a cooler location for storage.  Our basement is where most my hard work is stored.  When I take home canned goods on camping trips, we don't typically get too hot that I'm concerned about the food spoiling.  That's the beauty of the air conditioner on the camper.  Once a jar is opened, it stays in the fridge until it's empty.

I will add a number of recipes, each as their own post, and include a list for easier searching.

  • Bread & Butter Pickles
  • Dill pickles
  • Peaches
  • Salsa
  • Strawberry Jam
  • Zucchini Relish