Tuesday, July 29, 2014

The bare essentials: What do you need to camp?

I had a conversation recently with a long distance friend who was thinking about planning for a weekend camping trip.  She had never been camping before and wanted to know what all she needed to have a successful camping weekend.  This was the list we came up with:

Shelter
  • You need something to keep you protected from the elements, a tent or a camper.  If you don't have a tent, can you borrow one from someone?  Campers get a bit more tricky to borrow.
  • A tarp to go underneath the tent helps protect the bottom of the tent from something sharp and helps to keep any water from seeping in.
  • Hammer for tent stakes
Bedding
  • Sleeping bag or some bedding from your home.
  • Air mattress or one of those foamy mats, you'll want something to keep you off the hard, bumpy ground.  A pool float could work in a pinch
  • Pillows
Meals
  • Cooler and ice to keep your food cold
  • Paper plates & plastic utensils OR enough reusable dishes & utensils for everyone in your camping group
  • Cookware - pots & pans, what will you need for the food you're planning?
  • How are you cooking your food?  Bringing a small grill with you? Does the campground provide a grill?  Do you need charcoal?
  • Stick with easy food for your first time, see what works and doesn't work
  • Firewood - may need to be purchased in the campground
  • A water container for drinking and/or washing dishes
  • Grilling forks if you plan on smores or hot dogs
  • Preferred condiments
  • Beverages and cups
Other stuff
  • First aid kit
  • Garbage bags
  • Lighter
  • Lighter fluid
  • Flashlights or lantern
  • Towels, even if you're skipping showers until you get home
  • Soap & hand sanitizer
  • Toilet paper, depending on where and how you're camping
  • Paper towel
  • Trash bags
  • Change of clothing
  • Sunscreen
  • Bug spray
  • Plastic grocery bags for wet clothes or sticky stuff or dog logs or any of a million other purposes
Nice, but not necessary
  • Vinyl tablecloth to cover the picnic table
  • Small table
  • Aluminum foil
  • Ziplock type bags for food
Did I miss anything?  What would you add?

Monday, July 28, 2014

A Trip Itinerary

A must for a long trip is a good plan.  With our trip to Gatlinburg, I requested information online to give me ideas on what we might want to do.  Within a few weeks, I'd gotten several large envelopes with brochures for all sorts of tourist traps.

About a month before the trip, I spent time on the website for our campground, trying to get useful information (don't trust GPS in the mountains!).  The website also had tips for directions to help us miss traffic in Gatlinburg.

The whole reason for the trip is to explore Smoky Mountain National Park.  I spent a TON of time on that website.  I got more tips for our visit.  I started figuring out what our family would want to do, what we wouldn't want to do.

In my binder, I have:
  • Maps & directions
  • Addresses
  • Daily itinerary for the activities we'll be doing
  • Meals
  • Activities that might also interest us
  • All my planning notes
  • Extra paper

Thursday, July 24, 2014

Healthy snacks for a long car trip

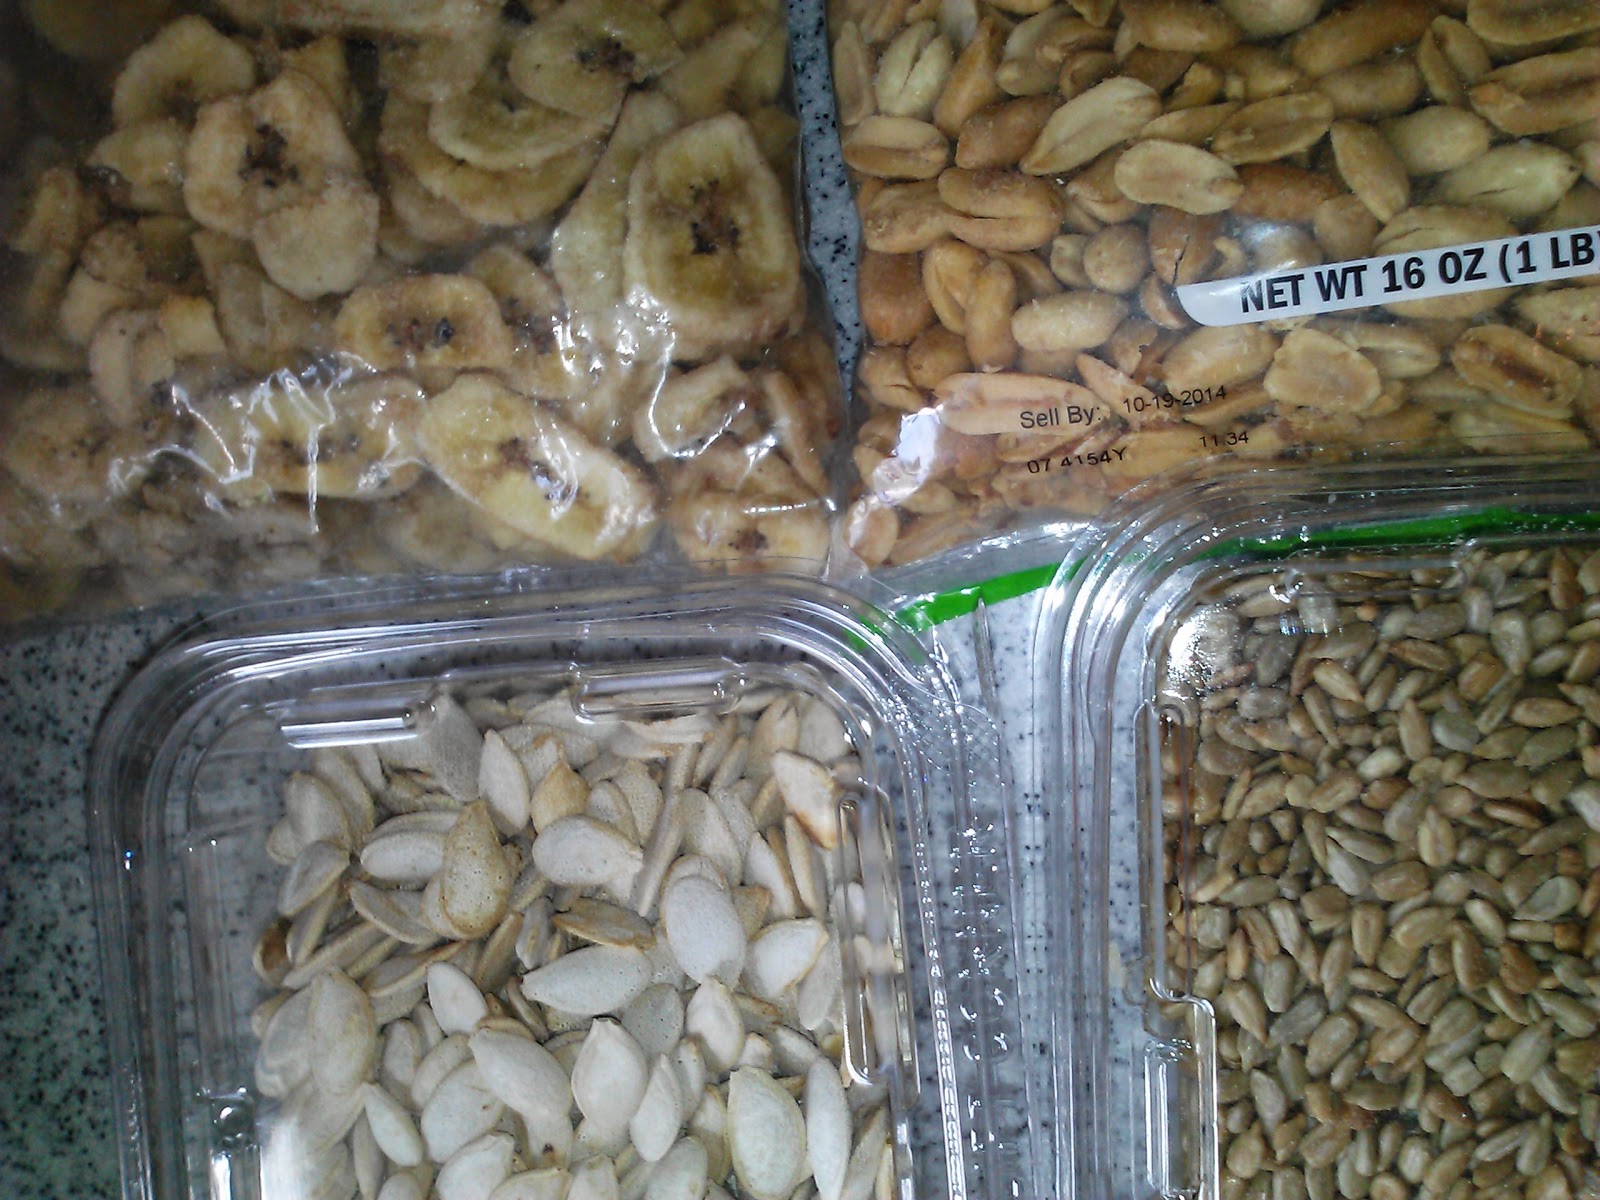
With a long car ride coming up, I wanted to make sure we had healthier snacks.  I dehydrated raspberries from the back yard and peaches & cherries from the farmer's market.


At the grocery store, I got peanuts, sunflower seeds.  Oldest kid asked for pumpkin seeds and Youngest kid wanted banana chips.


I separated out all of them into individually sized ziplock bags.  I'll keep some of the bags in the camper to eat later on, and I'll have some in the truck with us.


Wednesday, July 23, 2014

Kids packing themselves

As my kids are getting older, they are expected to have more involvement in getting ready for a camping trip.  They are responsible for packing their own belongings.  A couple years ago, I made a list of items for them that need to be packed.  The list is written in pencil and I can change the quantities of the items depending on the trip.  The same list gets used every time and goes back to the same spot in my dresser drawer until the next trip.  The kids are happy to be self-sufficient and get exactly what they want packed.


Youngest wasn't reading when I started this, so there are pictures to help her "read" on her own.

Tuesday, July 22, 2014

Keeping kids entertained on long car rides

A while back, I shared some of my ideas on bins and some car ride activities.  As I'm deep in preparation for Gatlinburg, one of the things I'm working on is making sure my kids keep entertained for both directions for the kids' longest car ride yet.

Today's brilliant ideas?

I printed maps from the internet and inserted them into their composition notebooks, aptly named Gatlinburg Journal (I'm creative, huh?).  I printed a map for each state that we'll drive through.  When the kids ask where we are, I can tell them to look at their maps.  They can follow where we're at.  They can learn some city names.  I'm pretty sure Oldest kid will love this.

I had gotten a bunch of stickers from the dollar store a while.  And by a bunch, I mean 2000.  Yay, $2!  I separated out the stickers into 4 envelopes.  Two kids, each will get an envelope on the trip down to Gatlinburg and another envelope with different stickers on the way home.  Similar stickers, but different for each leg of the trip.

I'm going to keep things on reserve for the trip home, to keep things fresh and keep them entertained.  I hope.  I'll let you know how it goes.

Saturday, July 19, 2014

How to be a polite camper

I think we've all had other campers that just annoy us in some way.  There are way to avoid being that camper that makes all the other campers unhappy campers.

  • Don't walk through other campsite, even if it's the most direct route to the bathroom/playground/nature trail/friends/whatever.  Sometimes I kinda want to booby trap our site to catch those who cut through repeatedly
  • Clean up your dog's logs.  They make handy dandy poop bag carriers, ours is clipped right to the leash, right where it's needed.
  • Keep the noise to a minimum, especially during quiet hours.
  • On the flip side, if you're going to sleep until 10 am in a tent, expect there to be some noise.
  • Smile and say hi when you're out for a walk.
  • Don't get rip-roaring drunk.
  • When your kids are having an house long screaming party at 6:30 am, do more than just say, "Hey!" once somewhere in the middle... not that I experienced that yesterday morning or anything...
What would you add?

Friday, July 18, 2014

Road Trip Game: 50 State License Plates

Long car trips require things to do.  For our upcoming trip to Gatlinburg, we'll keep track of the license plates that we see.  I remember doing it as a kid on vacation and I think it'll be one way to help pass the time with my family.


Click HERE for the PDF.

Thursday, July 17, 2014

Raspberry Freezer Jam

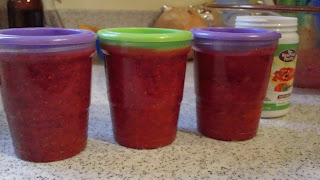
It's raspberry season in the back yard.  Raspberry jam is actually what started me preserving food.  I joke that Freezer Jam was my gateway drug.  If you've seen all of my canning recipes and thought I was crazy, here's your chance at something easy.  This recipe is from Ball.


Freezer Jam

You will need:
  • 4 cups crushed fruit (berries, apricots, grapes, pears, plums, or other tender fruit)
  • 1 1/2 cups of sugar
  • 5+ Tbsp Ball Real Fruit Instant Pectin (I typically need a bit more to get the right jam texture)
What to do:
  • Stir sugar and pectin in a bowl.
  • Add berries, stir 3 min
  • Ladle jam into clean jars to fill line.  Twist on lids.  Let stand until thickened, about 30 min.
Serve immediately, refrigerate, or freeze up to 1 year.

Wednesday, July 16, 2014

Firefly Jars

Oldest kid went to a slumber party over the weekend and came home with a firefly jar.  Of course, Youngest Kid saw and wanted to make her own.  Can't really blame her, can you?  We'll be camping with the slumber party family soon and all the kids will be bringing their new firefly jars.


What you need

  • Quart mason jar
  • Lid and band to keep the lid on
  • Decorations - stickers, duck tape, ribbon, use your imagination
What to do
  • Take a nail and hammer some holes into the lid, perhaps the first initial of the kid if you're making multiple firefly jars
  • Let your kid get creative while decorating, keeping sure that there is enough space that they can see into the jar to watch the fireflies
When catching fireflies
  • Food (aka: sticks and leaves) can be added to the jar to make the habitat a little nicer for the fireflies
  • Be sure to release the fireflies before the night is over

Monday, July 14, 2014

Zucchini Bread

Zucchini is just starting to come in our garden.  Zucchini bread is a favorite, especially for camping breakfasts.  I made my first 2 loaves of the season today.  The loaves that won't get eaten right away get wrapped up and put into the deep freezer for enjoyment all year long.  One year, both kids wanted to take zucchini bread for their classroom birthday treats and I was all over it because all I had to do was thaw and cut.

This is an easy recipe,  from the red and white gingham Better Homes and Gardens cookbook (I firmly believe this is a must have for every kitchen).

Zucchini Bread

Ingredients
  • 1 1/2 cups all-purpose flour
  • 1 teaspoon ground cinnamon
  • 1/2 teaspoon baking soda
  • 1/4 teaspoon salt
  • 1/4 teaspoon baking powder
  • 1/4 teaspoon nutmeg
  • 1 cup sugar
  • 1 cup finely shredded unpeeled zucchini
  • 1/4 cup cooking oil
  • 1 egg
  • 1/4 teaspoon finely shredded lemon peel
  • 1/2 cup chopped walnuts (optional)

Directions

  • In a mixing bowl combine flour, cinnamon, baking soda, salt, baking powder, and nutmeg.  In another mixing bowl combine sugar, shredded zucchini, cooking oil, egg, and lemon peel; mix well.  Add flour mixture; stir until just combined.  Stir in chopped walnuts.
  • Pour batter into a greased 8x4x2 loaf pan.  Bake in a 350 degree oven for 55-60 minutes or until a toothpick inserted near the center comes out clean.  Cool for 10 minutes on a wire rack.
  • Remove bread from the pan; cool thoroughly on a wire rack.  Wrap and store overnight before slicing.  Makes 1 loaf (16 servings).
Ok, so those are the official instructions.  I get out my handy-dandy Kitchen Aid mixer.  I dump in the zucchini first.  Then, I add the oil and egg.  I start the mixer on low.  I slowly add the sugar until mixed.  Then I add the nutmeg, baking powder, salt, baking soda, and cinnamon.  I add the flour slowly, making sure it mixes in well.  I skip the lemon peel and walnuts.  I often double or triple the recipe because of how much zucchini we get in our garden.

Friday, July 11, 2014

Chocolate Raspberry Sauce

It's raspberry season in our backyard.  I've spent a fair bit of time preserving the raspberries as they came in, though I think the quantity was cut in half as Oldest Kid picks one for the bucket, one for her, one for the bucket, one for her.  She just loves anything that ends in ~berry.

Yesterday afternoon, I made a family favorite, Chocolate Raspberry Sauce.  Ice cream topping is the obvious go-to for this treat.  If you're tenting it, ice cream in a cooler over the weekend may not work.  If you've got access to a fridge with a freezer, ice cream works a lot better.  Or maybe you want to create Pie Iron dessert with it?  If you make up a pie iron dessert, I'd love to hear about it.


What you need:

  • 4 1/2 cups crushed red raspberries (strawberries also work, HERE is my friend's recipe)
  • 6 Tbsp Ball Real Fruit Classic Pectin
  • 1/2 cup sifted unsweetened cocoa powder
  • 6 3/4 cups granulated sugar
  • 4 Tbsp lemon juice
What to do:
  • Prepare your boiling water canner and your separate pot of simmering water for lids and bands
  • Combine cocoa powder and pectin in a medium glass bowl, stirring until evenly blended.  Set aside
  • Combine crushed raspberries and lemon juice in a large saucepan.  Whisk in pectin mixture until dissolved.  Bring to a boil over high heat, stirring frequently.  Add sugar all at once and return to a full rolling boil, stirring constantly.  Boil hard for 1 minute, stirring constantly.  Remove from heat and skim off foam.
  • Ladle hot chocolate raspberry sauce into hot jars, leaving 1/4 inch headspace.  Remove air bubbles.  Wipe rim.  Center lid on jar.  Apply band until it is fingertip tight.
  • Process jars in your boiling water canner for 10 minutes.  Remove jars and cool.

If you're feeling generous, this has been well received when I have given it as a gift.  

I also want to clarify that I only use canning recipes from sources I trust to know about food safety.  Food preservation is not something I mess around with, experiment, or tweak.  I trust Ball and I trust the author of the blog I linked to earlier, I call her my Canning Guru.

Don't forget to follow me on Facebook.

Thursday, July 10, 2014

Bikes and scooters and skates, oh my!

We love to explore the campground while we are there.
Family bike rides are a fun way to do that and gives us time together.

Grand Haven 2012
The kids also love to roller skate/blade.


And the scooters are fun for the kids, too.


We make sure to have all the protective gear that our kids need.  The one time Oldest Kid didn't put on her hand, knee, and elbow guards on a camping trip, she took a spill off her scooter and got some lovely road rash on her hands.  We were in Hocking Hills and she got some great speed as she went down the hill and then she hit a rock in the road and down she went.  Now, all that protective gear is on my packing list.

Wednesday, July 9, 2014

Let's talk about garbage

Garbage.  We make it while camping.  I really like our collapsible garbage can.  It collapses while we're traveling, holds the garbage up when we're set up.  It does not keep the critters out of it at night, but a determined critter is going to find a way into garbage pretty no matter what you do.


If you want to be like us, here's the link to our garbage holder.


Tuesday, July 8, 2014

Laura Ingalls Wilder: a dream camping trip

Laura Ingalls Wilder, her pioneer story is an idealized part of the quilt of American history.

Growing up, I think I only read Little House on the Prairie, none of the other 8 books.  But I LOVED the TV show.  For Oldest Kid's 7th birthday, my parents gave her the first 3 books in the series and then completed the collection for her 8th birthday.

Reading these books together... it's fascinating.  As an adult, I've really enjoyed reading about her loosely fictionalized accounts of her life.  As a mom, reading them with my kid (ok, reading almost any book together) is magical.  There is so much to talk about with Laura's life - the way they lived, the way they thought, the reasons they continually moved, the lessons in American history that we don't often focus on in our classes.

A few years ago, a friend suggested that I read The Wilder Life: My Adventures in the Lost World of Little House on the Prairie.  It was a read that I really enjoyed.  The author makes a point to find all of the homes of Laura and writes about it.  Sarcasm, wit, following a dream.  Other friends have since read it and also enjoyed it.

Talking with my book club (ok, we haven't actually read any books in a couple of years, but we still call it book club), the idea of a big camping trip to find all of Laura's homesteads was born.

What a fun way for our kids to have history come alive.

Pepin, Wisconsin.  Independence, Kansas.  Walnut Grove, Minnesota.  Burr Oak, Iowa.  De Smet, South
Dakota.

My dad found The Little House Cookbook for us.  I now have an idealized vision of cooking like Laura.  Well, except for the fact that current American society does not typically use lard.  Or cracklings.  Or ammonium carbonate.  Killing 12 starlings won't be happening in my backyard and I definitely won't be cleaning them, either.  And people who make their own jam don't often use paraffin wax anymore.

But I could cook like her!  If I stick to her regular cornbread recipe or the full Thanksgiving dinner.

Youngest kid hasn't gotten into the Little House books yet. Once she does, I may entertain the idea of a camping vacation to find all of Laura's homesteads a bit more.  Until then, I will keep dreaming of how fun it would be to follow Laura Ingalls Wilder.

Sunday, July 6, 2014

Campfire Cooking: Pie Irons

There was this one trip... early in our camping days... Husband wanted to use our new Pie Irons... He put them in the fire to burn off the cooties from manufacturing... and the aluminum pie irons melted.

We were unhappy campers that had to scramble for dinner.

Enter the cast iron pie irons.  Worth the added cost.  Don't make the mistake we made.

On our last trip to Harrison Lake, we had Sloppy Joe pie iron sandwiches.  Yum-yum.

Beyond the typical pie filling deserts, here are other ideas:
  • Cherry cream cheese pies - 1 can Pillsbury crescent rolls, 4 Tbsp cream cheese, cherry pie filling, powdered sugar, and butter
  • Reuben sandwich - pumpernickel bread, thousand island dressing, deli sliced corned beef, Swiss cheese, sauerkraut (this will be my 2nd year making my own sauerkraut, should I share my recipe for that?)
  • Calzones - Pillsbury refrigerated pizza dough, tomato sauce, mozzerella cheese, your favorite pizza toppings
  • Jalapeno poppers - bread, jalapeno peppers, cheddar or your favorite cheese - kinda like a grilled cheese but with jalapenos
  • Cinnamon rolls - again from Pillsbury, or perhaps you like the store brand?
  • Tacos - tortillas, your favorite taco toppings
  • S'mores alternative - refrigerated crescent rolls, caramel, chocolate, marshmallows
  • Hash browns - frozen shredded hash browns, sour cream, cheddar cheese, bacon bits, green onions
  • Breakfast sandwich - bread, precooked sausage patties, scrambled eggs, cheddar cheese
  • Chicken chimichangas - tortillas, shredded or cubed cooked chicken, chopped onion, chopped green pepper, enchilada sauce, cheddar cheese - you can make ahead of time and freeze, just be sure they're thawed
  • Apple Raisin Danish - Pillsbury (hey, it's convenient?) Country Style Biscuits, brown sugar, cinnamon, thinly sliced apple, raisins
  • Stuffed French Toast - cinnamon swirl bread, chopped walnuts, cream cheese, sliced bananas, maple syrup for serving
  • Create something new with Chocolate Raspberry Sauce
Helpful idea:
  • With enough butter and/or non-stick spray, we don't have too many problems with our food sticking, but you could always line your pie iron with aluminum foil to eliminate all clean-up.  Doesn't everyone want to eliminate clean-up?
What is your favorite pie iron recipe?

Tuesday, July 1, 2014

Strawberry Jam & Strawberry Rhubarb Jam

Are you sick of my strawberry posts yet?  Ok, last one.  At least for now.  The raspberries are starting to be picked in the backyard, maybe I'll move on to those?

Anyway.  Last week, the kids and I picked 25 or so pounds of strawberries.  Because of our trip to Harrison Lake, I needed to get all those strawberries processed in a really big push on Thursday.  Fresh picked berries have a shorter shelf life than those berries purchased in the grocery store, especially since the place we go is as close to organic as you can get in the area.  I was so busy in the kitchen, I didn't even start to get things packed and in the camper until after dinner.

I have shared before that I like simple meals while camping.  Sandwiches are unexciting, but an easy lunch that can be assembled quickly if we're late to get back to the camper for lunch.  Or they can be packed for a picnic while hiking.  Youngest kid loves, LOVES her PB&J sandwiches, and homemade jam makes them so much better.

Strawberry Jam

What you need:
  • 2 quarts strawberries
  • 6 tablespoons Ball Classic Pectin
  • 1/4 cup lemon juice
  • 7 cups sugar
What to do:
  • Wash strawberries; drain.  Remove stems.  Crush strawberries one layer at a time.  Combine strawberries, classic pectin, and lemon juice in a large sauce pot.  Bring to a boil, stirring occasionally.  Add sugar, stirring until dissolved.  Return to a rolling boil.  Boil hard 1 minute, stirring constantly.  Remove from heat.  Skim foam if necessary.  Ladle hot jam into hot jars, leaving 1/4-inch headspace.  Adjust two-piece caps.  Process 10 minutes in a boiling-water canner.
Strawberry-Rhubarb Jam

What you need:
  • 2 cups crushed strawberries
  • 2 cups chopped rhubarb (about 4 stalks)
  • 6 TBS Ball Classic Pectin
  • 1/4 cup lemon juice
  • 5 1/2 cups sugar
What to do:
  • Combine strawberries, rhubarb, classic pectin and lemon juice in a large saucepot.  Bring to a boil over high heat.  Add sugar, stirring until dissolved.  Return to a rolling boil.  Boil hard 1 minute, stirring constantly.  Remove from heat.  Skim foam if necessary.  Ladle hot jam into hot jars, leaving 1/4 inch headspace.  Adjust two-piece caps.  Process 10 minutes in a boiling-water canner.