Showing posts with label food. Show all posts

Monday, February 2, 2015

Allie's Famous Chocolate Chip Cookies

Yesterday, we got about 13" of snow dumped on us.  Husband kept going out with the snow blower but within a couple of hours, you couldn't tell that he'd done anything.  Everything is shut down today and everyone is digging out.  Snow day means playing outside, then coming in to hot chocolate and freshly baked cookies.  These are also great to pass around the campfire.

I am not Allie, but she makes amazing cookies.  She shared this recipe with our group of friends, and those friends have shared the recipe.  Now, I'm sharing the recipe.  Allie does not have a blog, but I'll recommend her Etsy shop.

These cookies are huge.  Certainly, you can make them smaller and adjust the cooking time.  Isn't one of the joys of childhood eating a cookie bigger than your head?  It does limit you to eating too many because you just know that 1 is plenty.


Allie's Famous Chocolate Chip Cookies

What you need:

  • 2 cups flour
  • 1/2 teaspoon baking soda
  • 1/2 teaspoon salt
  • 3/4 cup melted putter (1.5 sticks)
  • 1 cup brown sugar
  • 1/2 cup white sugar
  • 1 Tablespoon vanilla extract
  • 1 egg
  • 1 egg yolk
  • 2 cups of semisweet chocolate chunks or chips

What to do:

  1. Preheat oven to 325 degrees
  2. Mix flour, baking soda, and salt together in a medium sized bowl.
  3. In a stand mixer, cream together the butter and sugars
  4. Add eggs slowly, then vanilla.  Slowly add the sifted dry ingredients.
  5. Stir in chocolate chips by hand
  6. Drop 1/4 cup balls, 3 inches apart on a baking sheet (they'll spread!)
  7. Bake for 15-17 minutes.  When they cookies are starting to brown on the edges, take them out.  You don't want to overbake these!

Sunday, January 25, 2015

Flawless Fudge


Last night, we went to a dinner party and I was in charge of dessert.  I've made this fudge numerous times, it's always a hit.  One of the other party guests repeatedly commented that this fudge melts in your mouth.  I'll take that compliment!

Bonus, it's super-duper easy.

What you need:

3 cups semi-sweet chocolate chips
1 (14 oz) can sweetened condensed milk
Dash of salt
1/2 to 1 cup chopped walnuts (optional)
1 1/2 teaspoon vanilla extract

What to do:
  • Line 8" or 9" square pan with aluminum foil, spray lightly with cooking spray.  Set aside.
  • In heavy saucepan, melt chips with sweetened condensed milk and salt.  Remove from heat.  Stir in vanilla and nuts (if desired).  Spread evenly into prepared pan.
  • Chill for 2 hours, until firm.  Turn fudge onto cutting board.  Peel off foil and cut into squares.  Store covered in refrigerator.

Tuesday, January 13, 2015

Taco Seasoning

Monday was Taco night this week.  I shared my recipe for Taco Chili last week and said that I'd share my personal recipe for taco seasoning that doesn't use a packet or orangish-redish powder, leaving the meat an orangish-redish color.  Using my own seasonings also cuts out sodium and makes the meat much more flavorful.

Last summer, I decided to try growing some of my own spices and dehydrating them.  You can see in the picture that I used my own dried oregano and basil.  What a flavor punch compared to your store bought stuff!


Here it is, the official recipe, not just what I had on hand last night:

Ingredients:
  • 1 Tbs chili powder
  • 1/4 tsp garlic powder
  • 1/4 tsp onion powder or minced onion flakes
  • 1/4 tsp crushed red pepper flakes
  • 1/4 tps dried oregano
  • 1/2 tsp paprika
  • 1 1/2 tsp ground cumin
  • 1 tsp sea salt
  • 1 tsp black pepper
What to do:

Brown 1 lbs of ground beef.  Drain fat.  Mix seasonings into pan and continue to cook on low for 5 minutes.

Note: I like to add a little bit of Zesty Salsa to my tacos when I assemble them.

Monday, January 5, 2015

Taco Chili

It's a cold and blustery January day in Michigan.  We had a wind chill advisory for most of the day, making it feel -14 degrees.  Husband suggested that maybe soup or chili would be great for dinner tonight.

Normally, I make Taco Chili in the crockpot.  My work schedule today had me putting it on the stove top and simmering all the ingredients for an hour (it's simmering as I type, I hope it turns out as flavorful as it normally does).  I have a strong love for my crock pot and it's definitely been part of the camping meal plans.  Ok, all 3 of my crock pots have made the trip (hey, sometimes you need varying sizes).


Taco Chili


1 lb ground beef
1 1.2-oz package taco seasoning mix
2 15-oz cans chunky Mexican-style tomatoes
1 15-oz. can red kidney beans
1 15-oz. can whole kernel corn

  1. In a large skillet cook ground beef until brown.  Drain fat.
  2. In a 3 1/2 to 4 quart slow cooker, combine the cooked ground beef, taco seasoning mix, undrained tomatoes, undrained beans, and undrained corn.  Cover and cook on low-heat setting for 4-6 hours or on high-heat setting for 2-3 hours.
Top as desired with corn chips, sour cream, sliced green onions, and cheese.

Note: I make my own taco seasoning usually.  I'll post the recipe that I started using, but now I just stare at the spices on hand and add to my taco meat without measuring.  It cuts out the sodium and creates better flavor.

Saturday, December 20, 2014

Buckeye Bark

I lived in Ohio for 10 years.  My favorite Buckeye is the one you eat at Christmastime.  Except rolling the peanut butter ball and dipping and all that, it's kind of a pain and time involved.  Enter Buckeye Bark, it's so much easier.

I got this recipe from another blog a few years ago.  I'd happily give credit where credit is due, but the recipe has been removed and the focus of the blog is completely different.  Thankfully, I'd saved the recipe and not relied on the blogger for future use.

What does this recipe have to do with camping?  Yeah, not a whole lot.  But it's yummy.  And a family favorite.

Ingredients:
  • 2.5 lbs of chocolate candy coating, white, dark, or milk
  • 1 lbs all natural creamy peanut butter
  • 2 cups powdered sugar
  • 1 stick of butter, melted
  • 1 tsp vanilla
What to do:

Melt 1.25 lbs of chocolate according to the directions on the package, spread over parchment paper or a silpat lined cookie sheet.  Spread to a large rectangle but not too thin, preferably a 1/4 inch thick.  Place in freezer.  In a large bowl, mix together the peanut butter, sugar, butter, and vanilla until creamy and smooth.  Spread over first chocolate layer.  Return to freezer.  Melt the remaining chocolate and spread over peanut butter layer.  Freeze until set.  Break into small pieces using a butcher knife - get out that frustration with your hacking!  Store in the fridge or freezer until ready to serve.

Wednesday, November 26, 2014

Rhubarb Custard Pie

Prepping for Thanksgiving tomorrow, I just pulled my pie out of the oven.  Kids are loving the smell of the house.  A while back, I said I'd have to share my recipe for Rhubarb Custard Pie (here's my recipe for Rhubarb Cake).  It's a favorite in this family.  We have abundant rhubarb that grows in the garden every summer.  So abundant that I'll happily give it away to those that ask.  Or don't ask, I'll push it on people.  I'm a rhubarb pusher.  Or something.

Anyway...

The sugar in the custard filling cuts the bitterness of the rhubarb.  I am not a fan of straight rhubarb, but love this pie.  I freeze rhubarb in the warmer months in quantities for making pies.  I have definitely taken pie on camping trips, too.  My MIL gave me her recipe and now I share it with you.

What you need:

Pie Filling:

  • 4 cups chopped rhubarb
  • 3 eggs
  • 3 Tbsp milk
  • 2 cups sugar
  • 1/4 cup flour
  • 3/4 tsp nutmeg
Pie Crust:
  • Haha!!  I just use the refrigerated Pillsbury crust!  I used to make my own with Crisco, but I'm good with the stuff from the store.
What to do:

Preheat oven to 425 degrees.  In a mixing bowl, stir together the eggs, milk, sugar, flour, and nutmeg.  Add the rhubarb and mix together.  Take a refrigerated pie crust and line your pie pan.  Pour rhubarb filling into the lined pie pan.  Take 2nd pie crust and cut into 3/4" strips.  Lay strips similarly spaced on your filled pie crust in one direction, then lay the remaining strips in a perpendicular direction.  Fold lower crust over the pastry strips and press firmly to seal.  You will want to put some foil over the edge of your crust to prevent burning.  Bake pie at 425 degrees for 20 minutes, then lower the oven temp to 375 degrees and bake for an additional 40 minutes.

Wednesday, October 8, 2014

Bob's Crab Puffs

For our upcoming Halloween camping trip, our group decided to do an appetizer lunch on Saturday before trick-or-treating.  One of my contributions is this recipe.  I love that I can premake it and freeze it.  I'll heat them up in the oven in the camper and serve.  I've made it countless times and it's always a big hit.

Sidenote: I don't know the Bob that created this recipe.  This is a distinction to be made for those that know me IRL.
Ready to freeze

What you need:

  • 1 package English Muffins
  • 1 can (4.25 oz) crab meat, drained
  • 1 small jar Kraft Old English Cheese Spread
  • 1 stick butter, softened
  • 2 T. mayonnaise
  • 2 drops Tabasco Sauce
What to do:

Slice each English Muffin in half (or just separate, depends on which brand you buy).  Cut each half into quarters.  Mix remaining ingredients.  Spread mixture on the cut English Muffins.  Freeze.  Once thoroughly frozen, put in a large plastic bag until ready to serve.  Thaw, place in oven at 350 degrees for 20 minutes.  

Of course, you can skip the freezing step if you prefer to have them sooner.

Another sidenote: I've been questioned on the Old English Cheese Spread.  When I shopped at Kroger years ago, I'd find it in the non-refrigerated cheese section, by the Velveeta.  I now shop at Meijer and I find it in the refrigerated cheese section, near the Cracker Barrel cheese spreads.  To help you out, you can have a picture to help in visual recognition.


Saturday, September 27, 2014

Apple Squares

Apple season is upon us.  I currently have a batch of Applesauce in the crock pot.  I'll be getting more apples to make more apple-y things.  The kids do make it hard, they see fresh picked apples and suddenly they're eating 2 and 3 apples each a day.

This time of year doesn't just mean apples, it also means Halloween camping is approaching.  Our Halloween camping trips are always really big group affairs.  I took these Apple Squares one year and got tons of compliments.  I made them at home and served them cold.  A reheat in the oven would work well, but it was cool that trip and the dish would not have stayed warm long.

Ingredients
1 cup sifted all-purpose flour
1 teaspoon baking powder
1/4 teaspoon salt
1/4 teaspoon ground cinnamon
1/4 cup butter or margarine, melted
1/2 cup packed brown sugar
1/2 cup white sugar
1 egg
1 teaspoon vanilla extract
1/2 cup chopped apple
1/2 cup finely chopped walnuts (optional)
2 tablespoons white sugar
2 teaspoons ground cinnamon

What to do
  • Preheat oven to 350 degrees.  Grease 9x9 inch pan.  Sift together flour, baking powder, salt, and 1/4 teaspoon of cinnamon.  Set aside.
  • In a large bowl, mix together melted butter, brown sugar, and 1/2 cup of white sugar with a wooden spoon until smooth.  Stir in the egg and vanilla.  Blend in the flour mixture until just combined, then stir in the apples and walnuts.  Spread the mixture evenly into the prepared pan.  In a cup or small bowl, stir together then remaining cinnamon and sugar; sprinkle over the top of the bars.
  • Bake for 25-30 minutes in preheated oven; finished bars should spring back when lightly touched.  Cool in the pan and cut into squares.

Wednesday, August 20, 2014

Fresh Rhubarb Cake

Just like zucchini, we get a TON of rhubarb every year.  We have 2 very large rhubarb plants in the backyard.  So big that I'm always happy to give it away.  To mix up the routine of all that Zucchini Bread that I make and freeze and take on camping trips, my SIL shared this Rhubarb Cake recipe with me.

Cake ingredients
  • 1/2 cup butter, softened
  • 1 1/2 cups brown sugar, firmly packed
  • 1 egg
  • 1 tsp vanilla
  • 2 cups flour
  • 1/4 tsp salt
  • 1 tsp baking soda
  • 1 Tbs lemon juice
  • 1 cup milk
  • 2 cups coarsely chopped fresh rhubarb
Topping ingredients
  • 1/2 cup pecans
  • 1/2 cup sugar
  • 1 tsp ground cinnamon
What to do:
  • To prepare cake, preheat oven to 350 degrees.  Grease and flour a 9 x 13 inch pan.  Cream butter until light.  Add brown sugar; continue to cream until mixture is well blended and fluffy.  Beat egg and vanilla into the creamed mixture until blended.  In a separate bowl sift the flour, salt, and soda.  In another bowl combine the lemon juice and milk; add it alternately with the flour mixture to the creamed mixture, beginning and ending with the flour.  Gently fold the chopped rhubarb into the batter, stirring just enough to distribute evenly.  Pour batter into prepared pan, spreading evenly.
  • To prepare topping, mix topping ingredients and sprinkle evenly over the batter.  Bake cake for 45 to 50 minutes.  Cool the cake in the pan for at least 30 minutes.  Cut into squares to serve.  Serves 12.

 Now that I'm thinking about it, I'll have to share my recipe for rhubarb custard pie soon, too [adds to mental list of future posts].

Friday, August 1, 2014

Easy breakfast for a long car trip

For our trip down to Gatlinburg, we planed on hitting the road extra early.  I was hopeful that the kids would sleep longer in the car.  This means having some breakfast on the road.  I want to skip the drive-thru as much as possible.


I got some croissants at the grocery store and made some breakfast sandwiches.  I popped them into ziplock bags and then back into the container that the croissants came in.  I had them in the fridge overnight and grabbed them in the morning.  When anyone asked for breakfast, it was ready to go.

I also put slices of zucchini bread in individual ziplock bags because we all love zucchini bread.

Thursday, July 24, 2014

Healthy snacks for a long car trip

With a long car ride coming up, I wanted to make sure we had healthier snacks.  I dehydrated raspberries from the back yard and peaches & cherries from the farmer's market.


At the grocery store, I got peanuts, sunflower seeds.  Oldest kid asked for pumpkin seeds and Youngest kid wanted banana chips.


I separated out all of them into individually sized ziplock bags.  I'll keep some of the bags in the camper to eat later on, and I'll have some in the truck with us.


Thursday, July 17, 2014

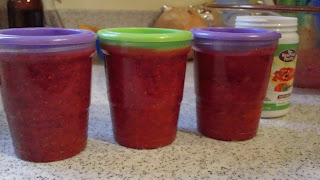
Raspberry Freezer Jam

It's raspberry season in the back yard.  Raspberry jam is actually what started me preserving food.  I joke that Freezer Jam was my gateway drug.  If you've seen all of my canning recipes and thought I was crazy, here's your chance at something easy.  This recipe is from Ball.


Freezer Jam

You will need:
  • 4 cups crushed fruit (berries, apricots, grapes, pears, plums, or other tender fruit)
  • 1 1/2 cups of sugar
  • 5+ Tbsp Ball Real Fruit Instant Pectin (I typically need a bit more to get the right jam texture)
What to do:
  • Stir sugar and pectin in a bowl.
  • Add berries, stir 3 min
  • Ladle jam into clean jars to fill line.  Twist on lids.  Let stand until thickened, about 30 min.
Serve immediately, refrigerate, or freeze up to 1 year.

Monday, July 14, 2014

Zucchini Bread

Zucchini is just starting to come in our garden.  Zucchini bread is a favorite, especially for camping breakfasts.  I made my first 2 loaves of the season today.  The loaves that won't get eaten right away get wrapped up and put into the deep freezer for enjoyment all year long.  One year, both kids wanted to take zucchini bread for their classroom birthday treats and I was all over it because all I had to do was thaw and cut.

This is an easy recipe,  from the red and white gingham Better Homes and Gardens cookbook (I firmly believe this is a must have for every kitchen).

Zucchini Bread

Ingredients
  • 1 1/2 cups all-purpose flour
  • 1 teaspoon ground cinnamon
  • 1/2 teaspoon baking soda
  • 1/4 teaspoon salt
  • 1/4 teaspoon baking powder
  • 1/4 teaspoon nutmeg
  • 1 cup sugar
  • 1 cup finely shredded unpeeled zucchini
  • 1/4 cup cooking oil
  • 1 egg
  • 1/4 teaspoon finely shredded lemon peel
  • 1/2 cup chopped walnuts (optional)

Directions

  • In a mixing bowl combine flour, cinnamon, baking soda, salt, baking powder, and nutmeg.  In another mixing bowl combine sugar, shredded zucchini, cooking oil, egg, and lemon peel; mix well.  Add flour mixture; stir until just combined.  Stir in chopped walnuts.
  • Pour batter into a greased 8x4x2 loaf pan.  Bake in a 350 degree oven for 55-60 minutes or until a toothpick inserted near the center comes out clean.  Cool for 10 minutes on a wire rack.
  • Remove bread from the pan; cool thoroughly on a wire rack.  Wrap and store overnight before slicing.  Makes 1 loaf (16 servings).
Ok, so those are the official instructions.  I get out my handy-dandy Kitchen Aid mixer.  I dump in the zucchini first.  Then, I add the oil and egg.  I start the mixer on low.  I slowly add the sugar until mixed.  Then I add the nutmeg, baking powder, salt, baking soda, and cinnamon.  I add the flour slowly, making sure it mixes in well.  I skip the lemon peel and walnuts.  I often double or triple the recipe because of how much zucchini we get in our garden.

Friday, July 11, 2014

Chocolate Raspberry Sauce

It's raspberry season in our backyard.  I've spent a fair bit of time preserving the raspberries as they came in, though I think the quantity was cut in half as Oldest Kid picks one for the bucket, one for her, one for the bucket, one for her.  She just loves anything that ends in ~berry.

Yesterday afternoon, I made a family favorite, Chocolate Raspberry Sauce.  Ice cream topping is the obvious go-to for this treat.  If you're tenting it, ice cream in a cooler over the weekend may not work.  If you've got access to a fridge with a freezer, ice cream works a lot better.  Or maybe you want to create Pie Iron dessert with it?  If you make up a pie iron dessert, I'd love to hear about it.


What you need:

  • 4 1/2 cups crushed red raspberries (strawberries also work, HERE is my friend's recipe)
  • 6 Tbsp Ball Real Fruit Classic Pectin
  • 1/2 cup sifted unsweetened cocoa powder
  • 6 3/4 cups granulated sugar
  • 4 Tbsp lemon juice
What to do:
  • Prepare your boiling water canner and your separate pot of simmering water for lids and bands
  • Combine cocoa powder and pectin in a medium glass bowl, stirring until evenly blended.  Set aside
  • Combine crushed raspberries and lemon juice in a large saucepan.  Whisk in pectin mixture until dissolved.  Bring to a boil over high heat, stirring frequently.  Add sugar all at once and return to a full rolling boil, stirring constantly.  Boil hard for 1 minute, stirring constantly.  Remove from heat and skim off foam.
  • Ladle hot chocolate raspberry sauce into hot jars, leaving 1/4 inch headspace.  Remove air bubbles.  Wipe rim.  Center lid on jar.  Apply band until it is fingertip tight.
  • Process jars in your boiling water canner for 10 minutes.  Remove jars and cool.

If you're feeling generous, this has been well received when I have given it as a gift.  

I also want to clarify that I only use canning recipes from sources I trust to know about food safety.  Food preservation is not something I mess around with, experiment, or tweak.  I trust Ball and I trust the author of the blog I linked to earlier, I call her my Canning Guru.

Don't forget to follow me on Facebook.

Sunday, July 6, 2014

Campfire Cooking: Pie Irons

There was this one trip... early in our camping days... Husband wanted to use our new Pie Irons... He put them in the fire to burn off the cooties from manufacturing... and the aluminum pie irons melted.

We were unhappy campers that had to scramble for dinner.

Enter the cast iron pie irons.  Worth the added cost.  Don't make the mistake we made.

On our last trip to Harrison Lake, we had Sloppy Joe pie iron sandwiches.  Yum-yum.

Beyond the typical pie filling deserts, here are other ideas:
  • Cherry cream cheese pies - 1 can Pillsbury crescent rolls, 4 Tbsp cream cheese, cherry pie filling, powdered sugar, and butter
  • Reuben sandwich - pumpernickel bread, thousand island dressing, deli sliced corned beef, Swiss cheese, sauerkraut (this will be my 2nd year making my own sauerkraut, should I share my recipe for that?)
  • Calzones - Pillsbury refrigerated pizza dough, tomato sauce, mozzerella cheese, your favorite pizza toppings
  • Jalapeno poppers - bread, jalapeno peppers, cheddar or your favorite cheese - kinda like a grilled cheese but with jalapenos
  • Cinnamon rolls - again from Pillsbury, or perhaps you like the store brand?
  • Tacos - tortillas, your favorite taco toppings
  • S'mores alternative - refrigerated crescent rolls, caramel, chocolate, marshmallows
  • Hash browns - frozen shredded hash browns, sour cream, cheddar cheese, bacon bits, green onions
  • Breakfast sandwich - bread, precooked sausage patties, scrambled eggs, cheddar cheese
  • Chicken chimichangas - tortillas, shredded or cubed cooked chicken, chopped onion, chopped green pepper, enchilada sauce, cheddar cheese - you can make ahead of time and freeze, just be sure they're thawed
  • Apple Raisin Danish - Pillsbury (hey, it's convenient?) Country Style Biscuits, brown sugar, cinnamon, thinly sliced apple, raisins
  • Stuffed French Toast - cinnamon swirl bread, chopped walnuts, cream cheese, sliced bananas, maple syrup for serving
  • Create something new with Chocolate Raspberry Sauce
Helpful idea:
  • With enough butter and/or non-stick spray, we don't have too many problems with our food sticking, but you could always line your pie iron with aluminum foil to eliminate all clean-up.  Doesn't everyone want to eliminate clean-up?
What is your favorite pie iron recipe?

Friday, June 27, 2014

Strawberry Butter

A friend shared this with me, and it tastes delightful on the Strawberry Bread.

Ingredients:
  • 1 stick unsalted butter, softened
  • 2 tbsp confectioners sugar
  • 1/2 tsp salt
  • 1/3 cup strawberries, diced
What to do:

In a small bowl, beat the butter, sugar and salt with an electric mixer (or by hand) until soft, about 1 minute.  Add strawberries and beat until just combined (or for smoother consistency beat 1-2 minutes).

Serve immediately.  Cover and store in the refrigerator.


Don't forget to follow me on Facebook :)

Wednesday, June 25, 2014

Strawberry Bread

We spent the afternoon picking strawberries - 26 pounds!  Last year, the strawberry farm had a few recipes out to take with you, including this Strawberry Bread.  We all really enjoyed it last year and I'm sure it will be a hit again this year.  Want to make it extra special?  Add some Strawberry Butter to your slice of Strawberry Bread.

You may be sitting there, wondering why I'm including a bread recipe on a camping blog.  I get it, I don't really bake while camping.  I do bake at home and take a loaf on a camping trip for a little something extra for breakfast.  Since prime growing season in Michigan is limited, I bake many loaves of bread and then put them in the deep freezer.  We're just now polishing off all the delicious bread that I made last year.

Ingredients:
  • 3 cups flour
  • 2 cups sugar
  • 1 tsp. baking powder
  • 1 tsp. salt
  • 1 tsp. cinnamon
  • 4 eggs beaten
  • 1 1/4 cup vegetable oil
  • 2 1/2 cups strawberries sliced and mashed slightly
What to do:
  1. In a large mixing bowl, sift together flour, sugar, baking powder, salt and cinnamon.
  2. In a medium size bowl, beat together eggs and oil until blended.  Stir in strawberries until combined.
  3. Make a well in the center of the flour mixture and add the egg mixture, stirring until thoroughly blended (do not over blend).
  4. Spoon batter evenly into 2 greased and floured 9x5x3 inch loaf pans.
  5. Bake 350 degrees for 1 hour or until a toothpick stuck in the center comes out clean.  Remove from pans to cool.

Saturday, June 21, 2014

Ziplock Omelet

My mom found this recipe years ago.  It's an easy way to feed a crowd and ensure that everyone gets what they want.  I've seen similar ideas with mason jars, but I think the Ziplock saves on space for travel.

What to do:

  • Have everyone write their name on a quart-sized Ziploc freezer bag with permanent marker (very important).
  • Crack 2 eggs (large or extra large) into each bag (not more than 2).  Shake to combine them.
  • Put out a variety of ingredients: cheeses, ham, onion, green pepper, tomato, hash browns, salsa, etc.  Each guests adds prepared ingredients of choice to their bag and shake.
  • Make sure to get the air out of the bag and zip it up.
  • Place the bags into rolling, boiling water for exactly 13 minutes.
  • You can usually cook 6-8 omelets in a large pot.  For more, make another pot of boiling water.
  • When time's up, open the bags, and the omelet will roll out easily.
  • Nice to serve with fresh fruit or bread.
Don't forget to follow me on Facebook!

Wednesday, June 18, 2014

Cooking over the fire

Cooking over the open fire goes with camping.  Lots of ways to do it, you've got to find what works for you.

You can see in the picture that Husband is cooking the Hearty Breakfast (yeah, it's the same picture because that's how I work) on our trip to Wilson State Park.  Breakfast is cooking in a cast iron dutch oven - don't forget your liners for easy clean up, like these.

Husband put the dutch oven on our own grill over the fire.  Some camp fire rings at some campgrounds have some sort of grill that you can lower down over the fire.  The fire ring in this picture is standard at most Michigan state parks (definitely not at Grand Haven state park, you don't get a fire ring there at all).  If we're planning on cooking over the fire, we make sure to bring our own grill.

The grill we have has a single stake to put your food right over the fire.  You can swivel it out to check and adjust your food so you don't scorch yourself.  You can adjust the height for optimal cooking.  I checked several camping sites trying to find our exact grill and this was the closest to the exact grill we have.  It works for us.

What do you like to use to grill over the open fire?

Thursday, June 12, 2014

Dill Pickles

Another post from my archives of canning.  This is from the same neighbor that gave me the Bread & Butter Pickle recipe.  As I'm getting ready for another camping trip this weekend, you can bet these are ready to go.

For each quart of pickles, you will need:
  • 5 or 6 4-inch pickling cucumbers
  • 3 or 4 heads of fresh dill
  • 1 teaspoon mustard seed
  • 2 cups water
  • 1 cup cider vinegar
  • 1 tablespoon pickling salt
What to do:

Pack cucumbers loosely in hot, clean quart jars.  Add dill and mustard seed to each quart.  Make a brine by combining water, vinegar, and salt.  Bring to boiling.  Slowly pour hot brine over cucumbers.  Prepare lids and rings.  Wipe jar and place lids and rings on jars.  Process in hot water bath, 10 minutes for pint and 15 minutes for a quart.  These pickles need to set for about 4 weeks before they are ready to eat.

If you want Kosher pickles, omit the mustard seed and add 1 clove of garlic and 1 small piece of hot red pepper to each quart.